OR Gate
The OR gate is one of the three basic logic gates, along with AND and NOT.
What is an OR gate?
An OR gate has two or more inputs and one output. The output is 1 (HIGH) if at least one input is 1. The output is 0 (LOW) only when all inputs are 0. For example a door opens if you scan a keycard OR use a fingerprint. Either one works. Both work too. The door stays shut only when neither is used.
Symbol
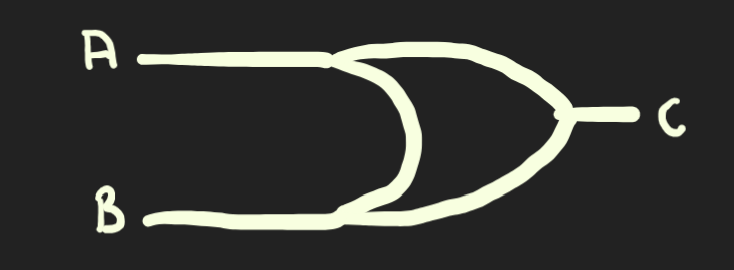
A and B are inputs. Y is the output.
Boolean expression
Y = A + B
The + here means OR, not normal addition. That is why 1 + 1 = 1 in Boolean algebra.
Truth table (2 inputs)
| A | B | Y = A + B |
|---|---|---|
| 0 | 0 | 0 |
| 0 | 1 | 1 |
| 1 | 0 | 1 |
| 1 | 1 | 1 |
Truth table (3 inputs)
An OR gate can have more than two inputs. For three inputs, Y = A + B + C.
| A | B | C | Y |
|---|---|---|---|
| 0 | 0 | 0 | 0 |
| 0 | 0 | 1 | 1 |
| 0 | 1 | 0 | 1 |
| 0 | 1 | 1 | 1 |
| 1 | 0 | 0 | 1 |
| 1 | 0 | 1 | 1 |
| 1 | 1 | 0 | 1 |
| 1 | 1 | 1 | 1 |
Only the first row gives 0. A gate with n inputs has 2ⁿ rows, and exactly one of them gives 0.
Boolean laws for OR
| Law | Expression |
|---|---|
| Identity | A + 0 = A |
| Null (dominance) | A + 1 = 1 |
| Idempotent | A + A = A |
| Complement | A + A’ = 1 |
| Commutative | A + B = B + A |
| Associative | (A + B) + C = A + (B + C) |
A' means NOT A.
OR Gate Lab
For this lab we need:
- Breadboard
- 7432 IC
- 5 V power supply
- 1 LED
- 1 resistor (220 Ω works well, anything up to 1 kΩ is fine)
- Jumper wires
We are using the 7432. It has four separate 2-input OR gates inside one chip, but we will use only the first one.
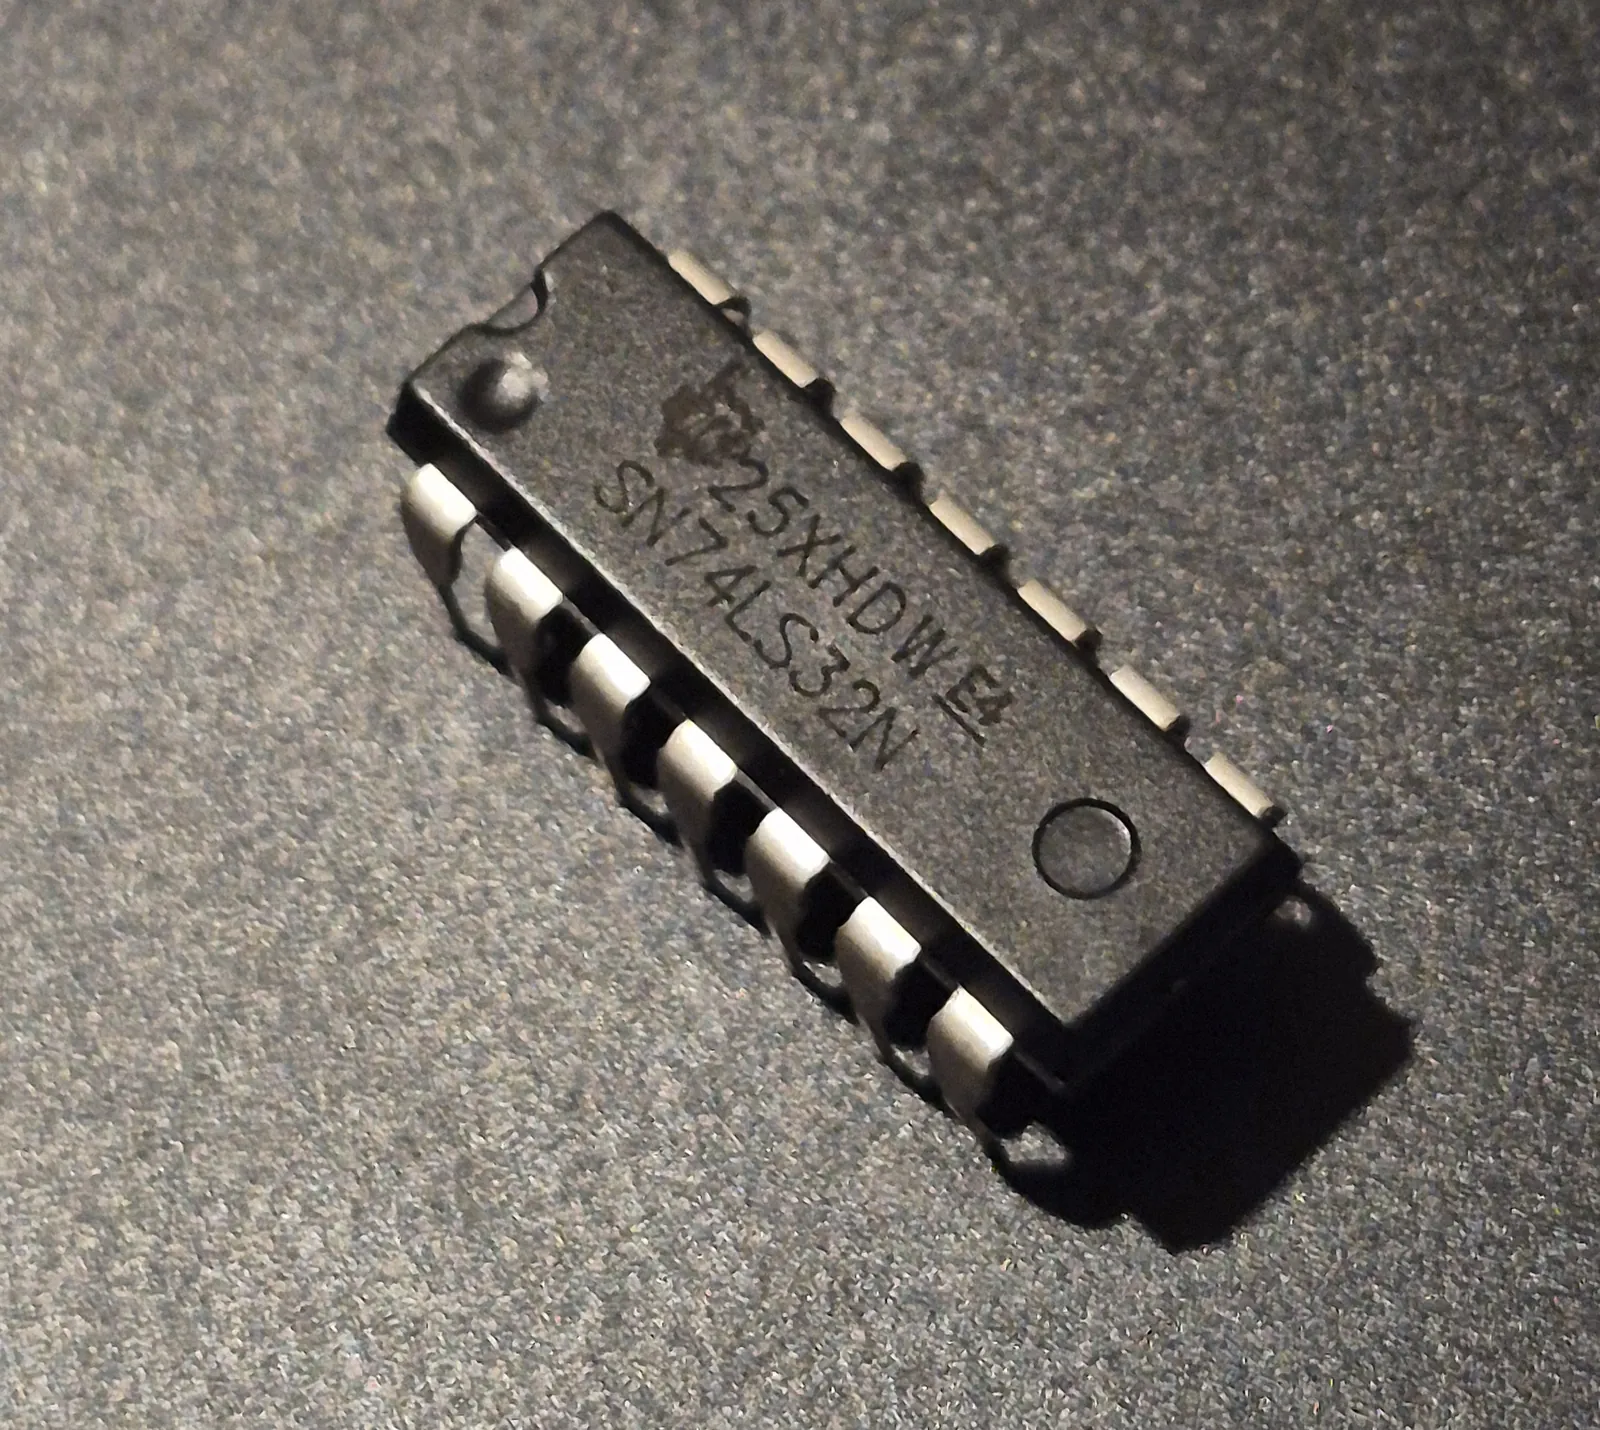
It has the following design:
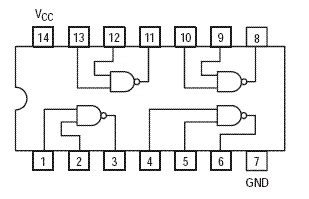
The diagram is quite self-explanatory. For the first gate, pins 1 and 2 are the inputs and pin 3 is the output. The other gates work the same way:
| Gates | Inputs | Outputs |
|---|---|---|
| 1 | Pins 1 and 2 | Pin 3 |
| 2 | Pins 3 and 4 | Pin 5 |
| 3 | Pin 9 and 10 | Pin 8 |
| 4 | Pin 12 and 13 | Pin 11 |
Place the chip across the middle gap of the breadboard so the two rows of pins do not touch each other. The notch on the chip marks the top. Pin 1 is on the left side of the notch.
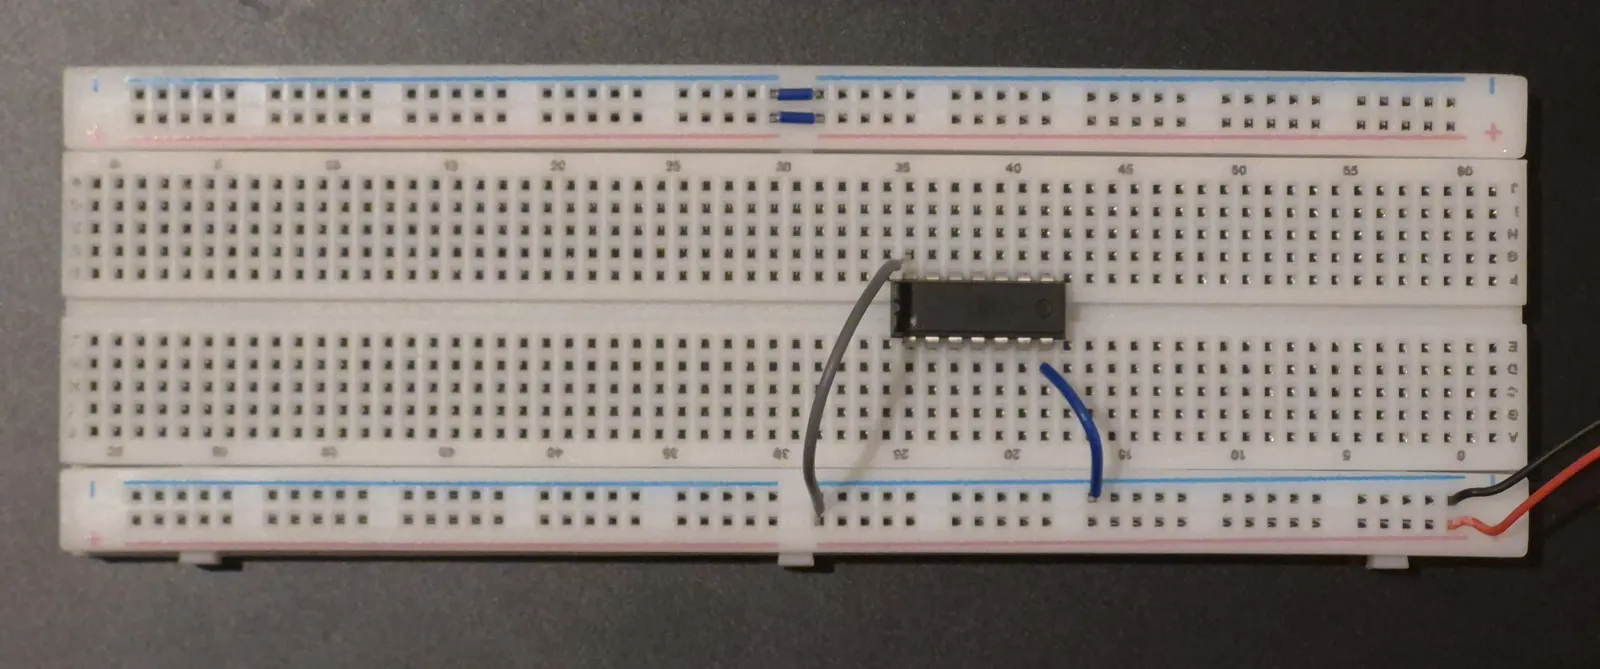
Every IC needs power to work. We connect pin 14 to the HIGH supply (+5 V) and pin 7 to ground. Without this, the gates will not work, even if the inputs are correct.
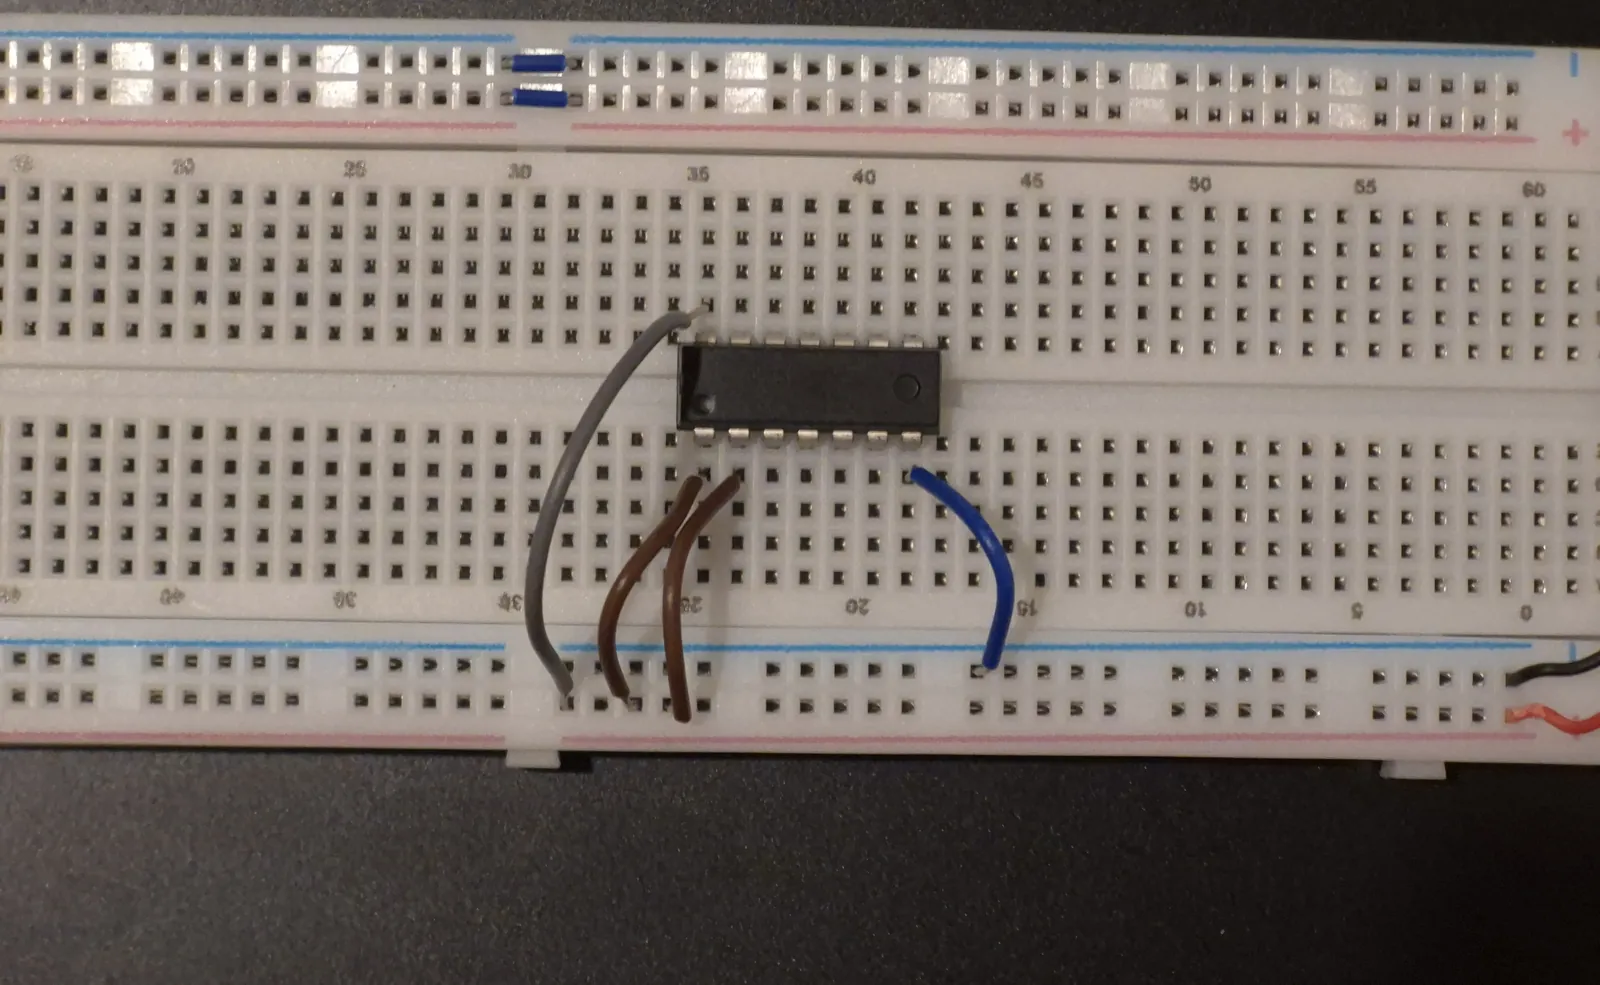
We connect one wire from the HIGH supply to pin 1 and another from the HIGH supply to pin 2. A wire connected to HIGH means that input is 1.
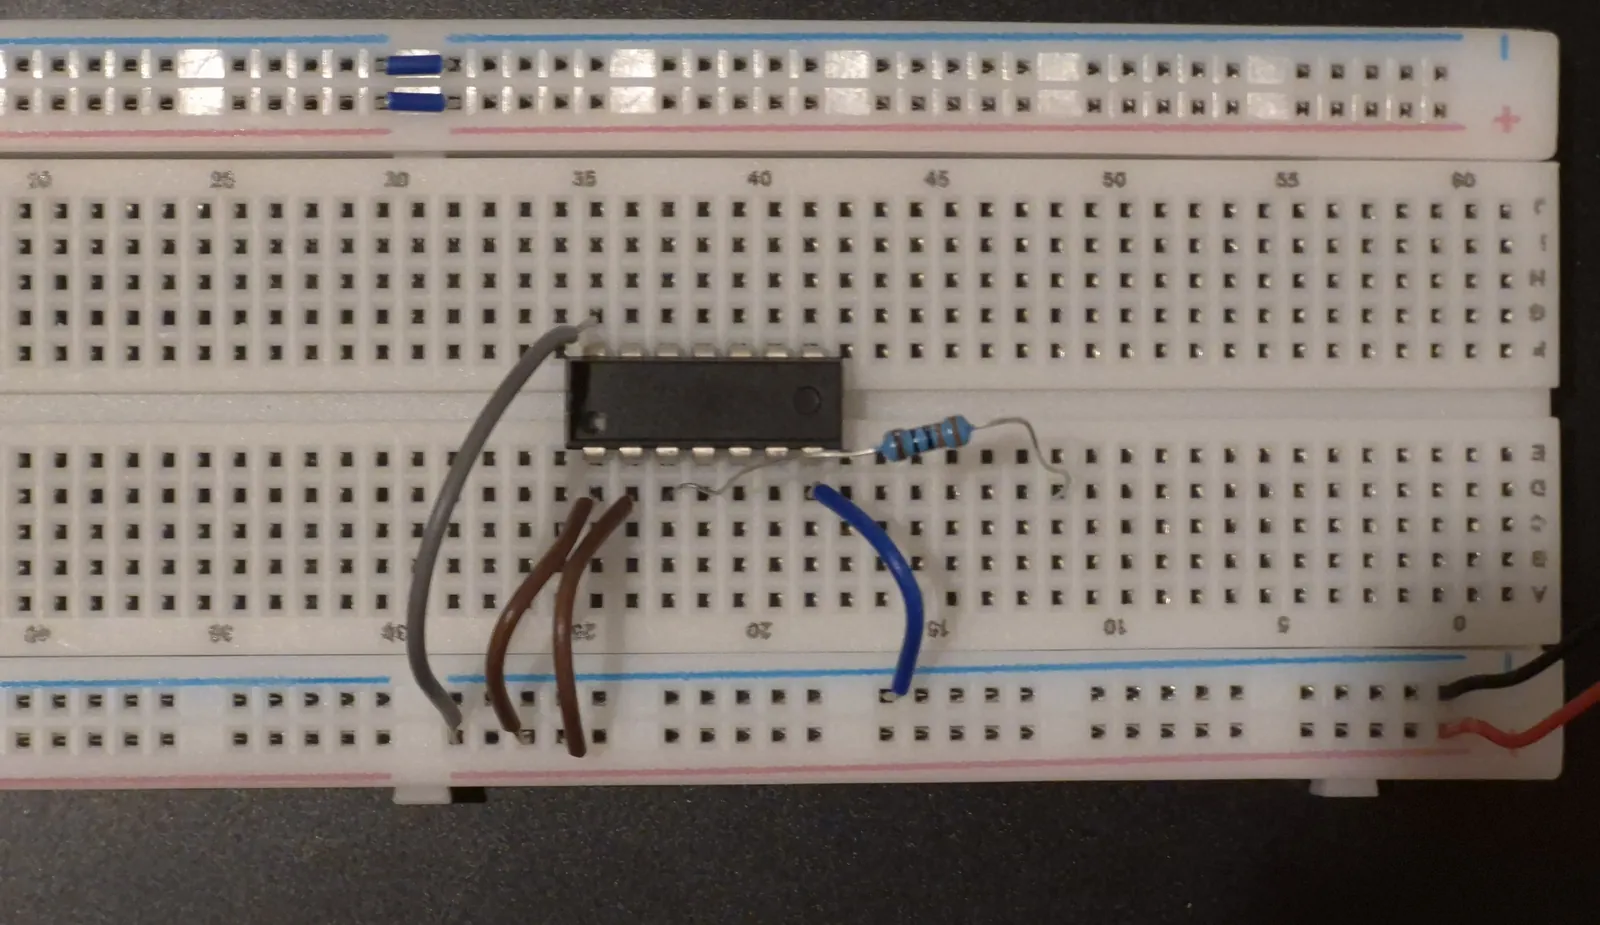
Pin 3 is our output. We cannot connect the LED directly to pin 3 because too much current can flow and burn it. An LED has no built-in protection, so we need a resistor to limit the current.
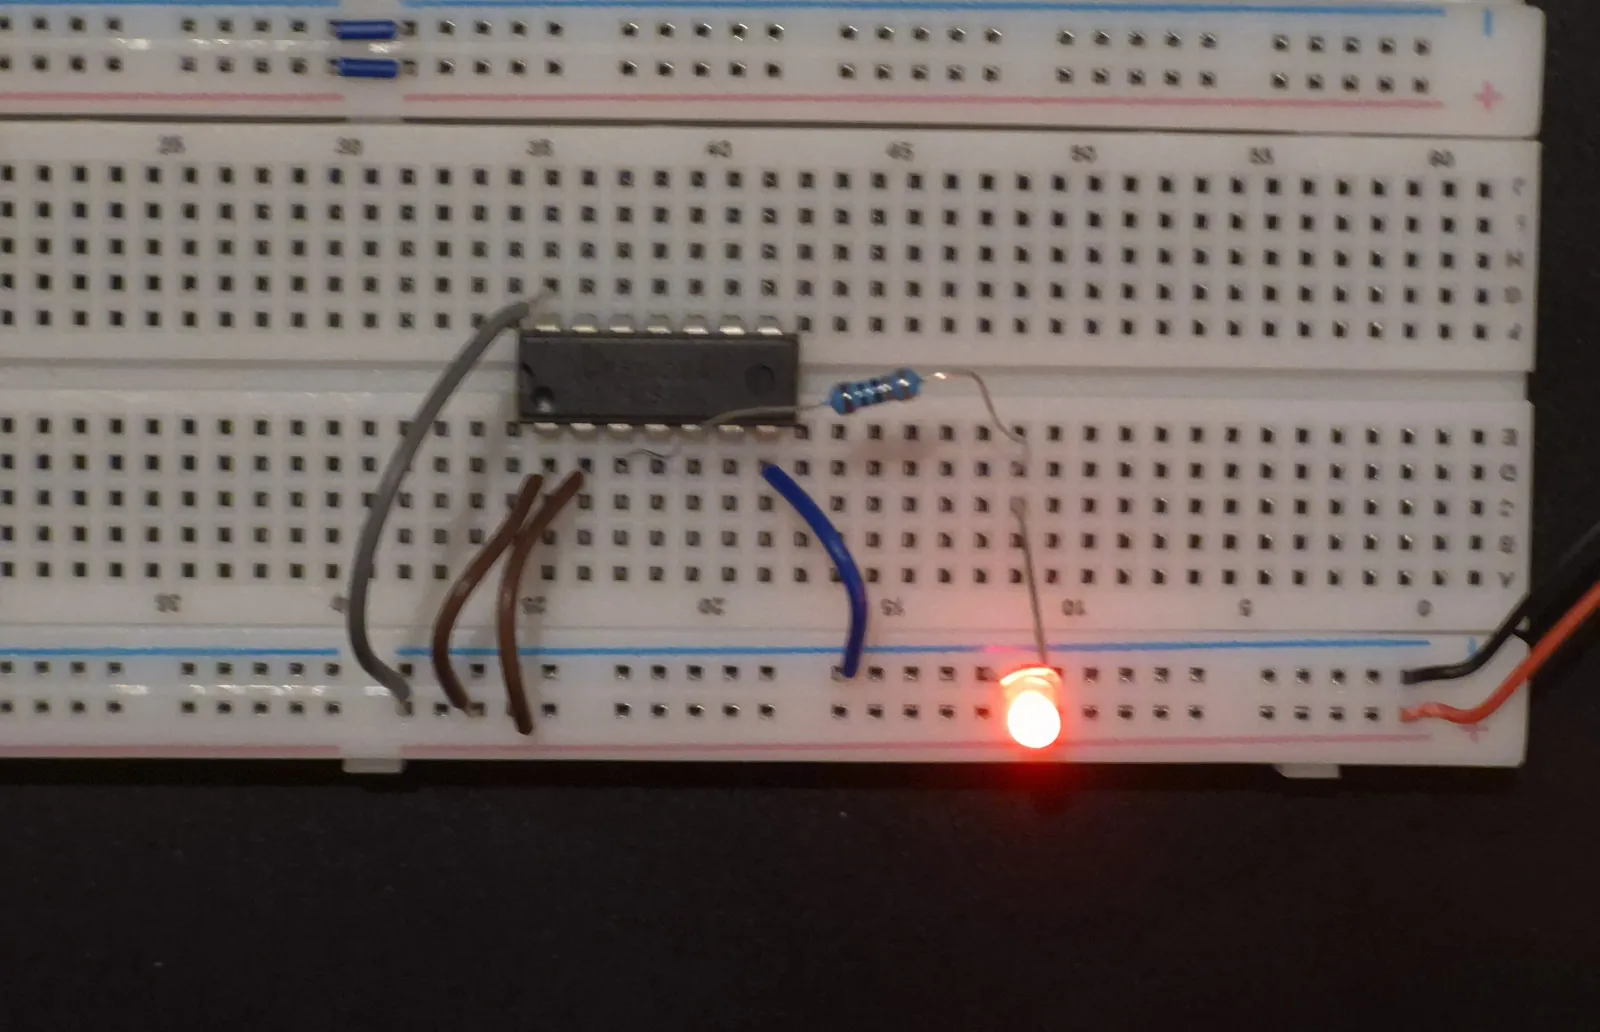
Connect one leg of the resistor to pin 3. Put the other leg of the resistor in any free column on the breadboard. Any column works, as long as nothing else is in it. Holes in the same column are connected together. In that same column, place the longer leg of the LED and connect the shorter leg of the LED to ground. An LED is a type of diode, and a diode lets current flow in only one direction. Current must enter through the longer leg (the positive side, called the anode) and leave through the shorter leg (the negative side, called the cathode). If we connect it the wrong way round, the LED will not light up. You can also find the short leg by the flat edge on the LED’s round body.
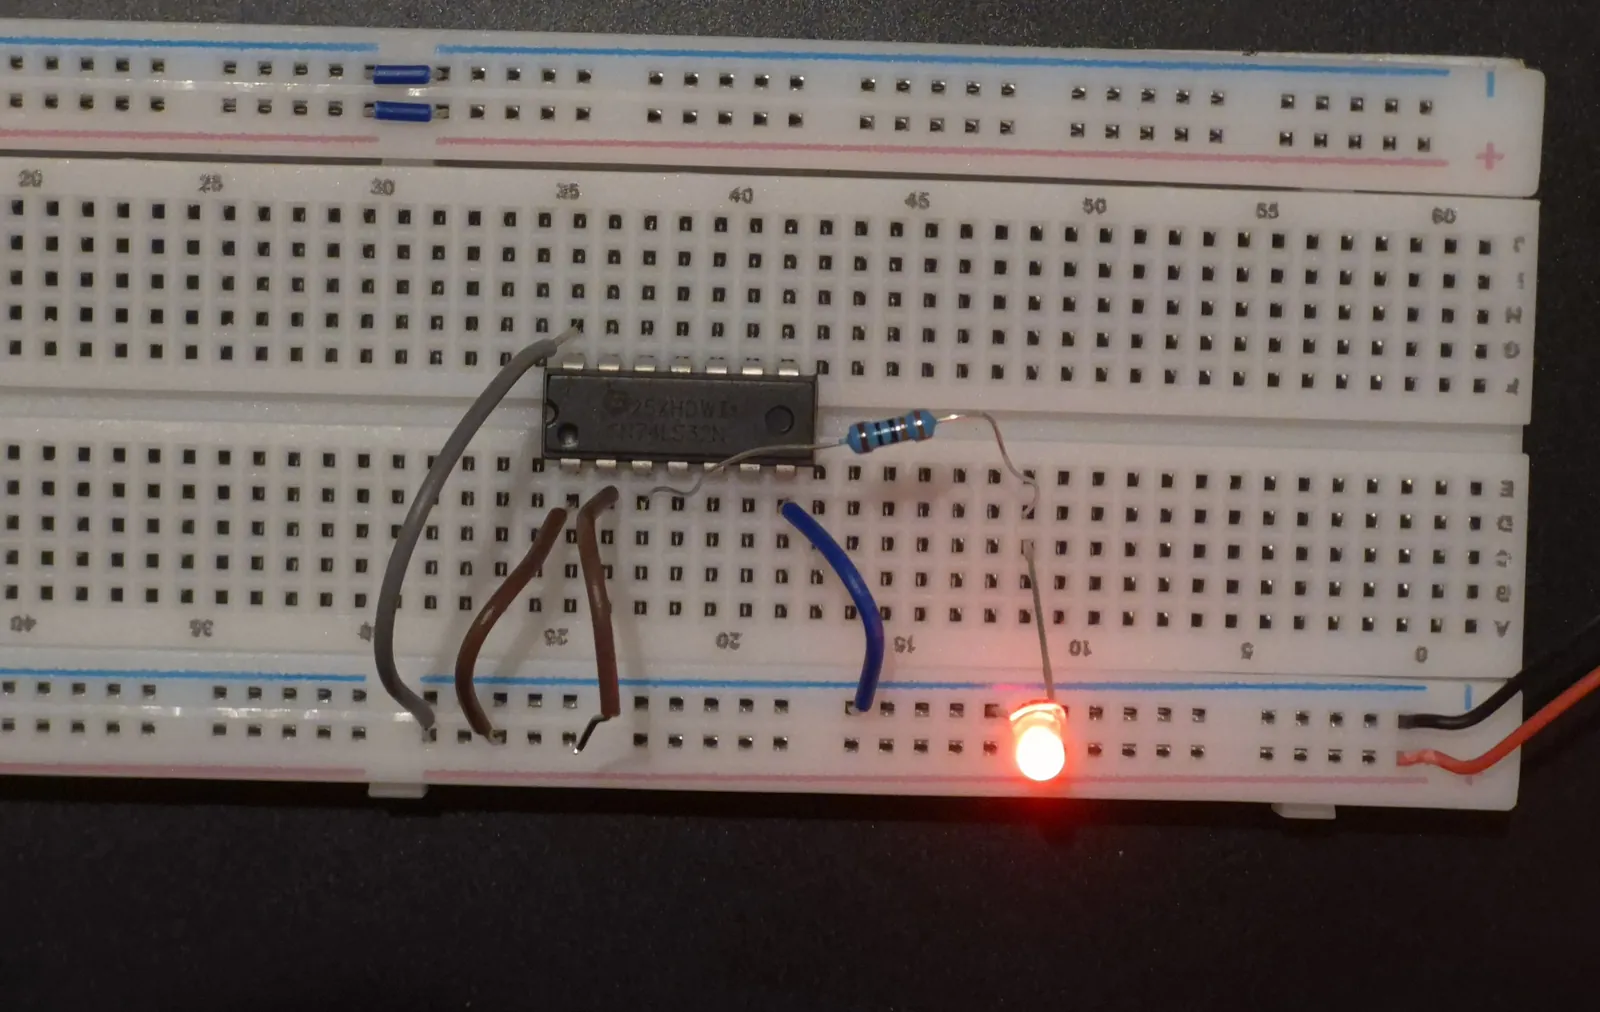
If we disconnect our input wire 2 we see the LED still lights up.
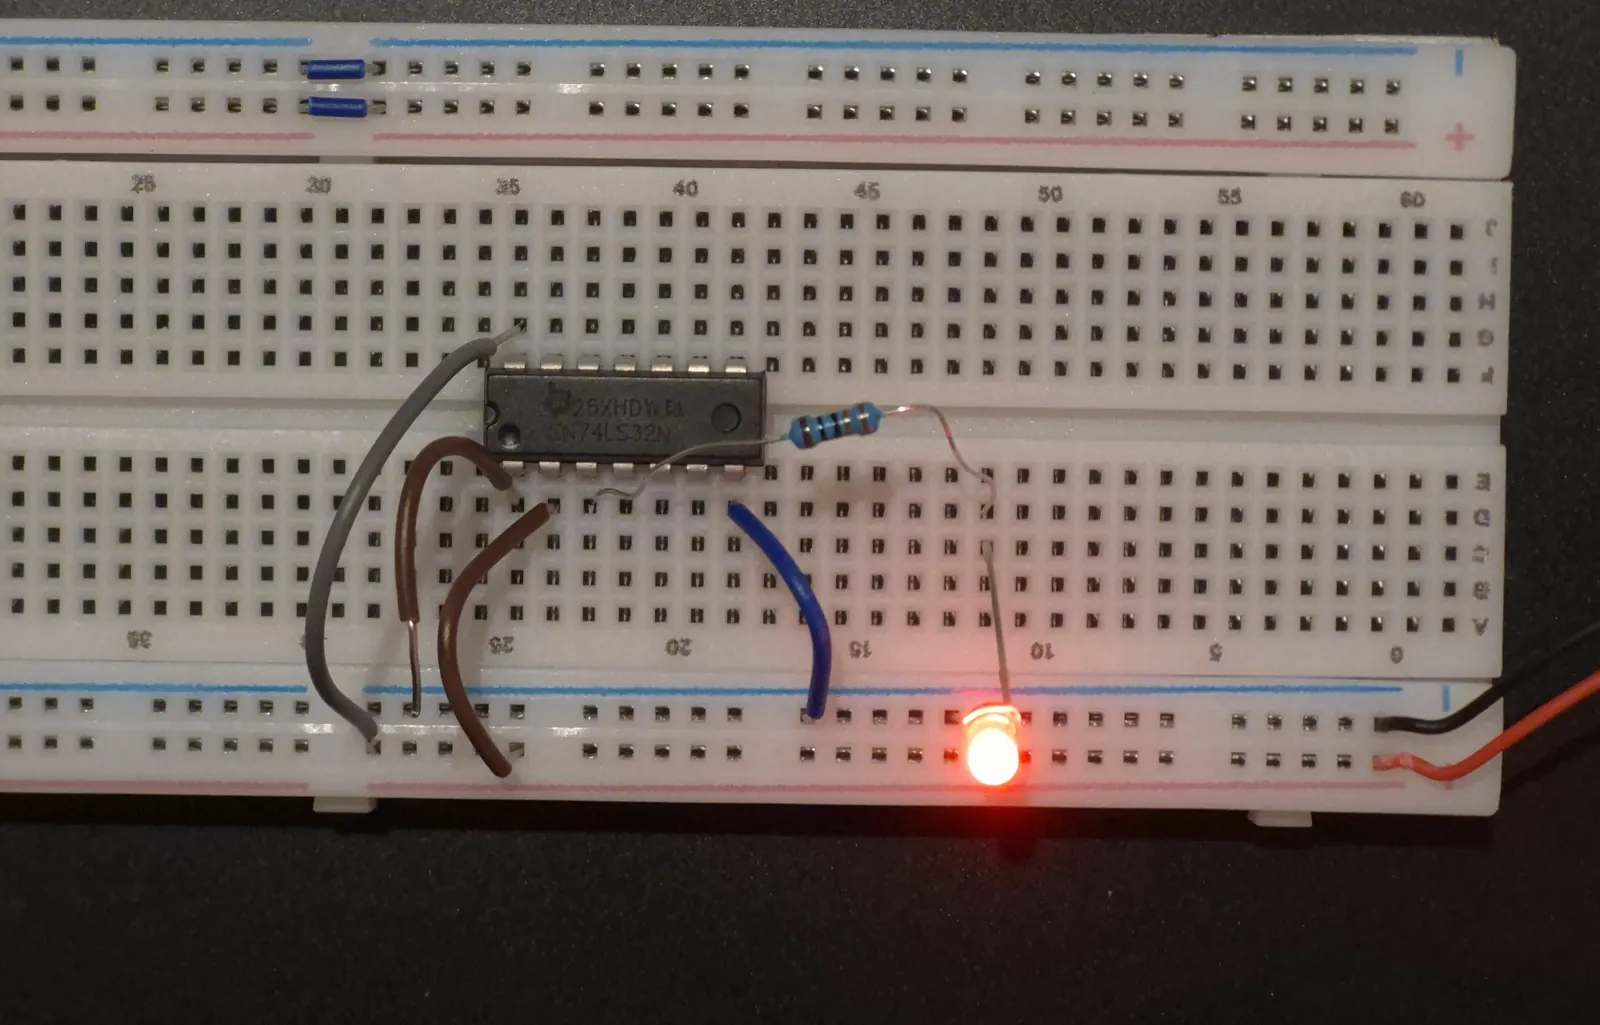
If we disconnect input wire 2 again the LED lights up showing that for an OR gate to work at least one wire needs to be connected for the input to be HIGH.
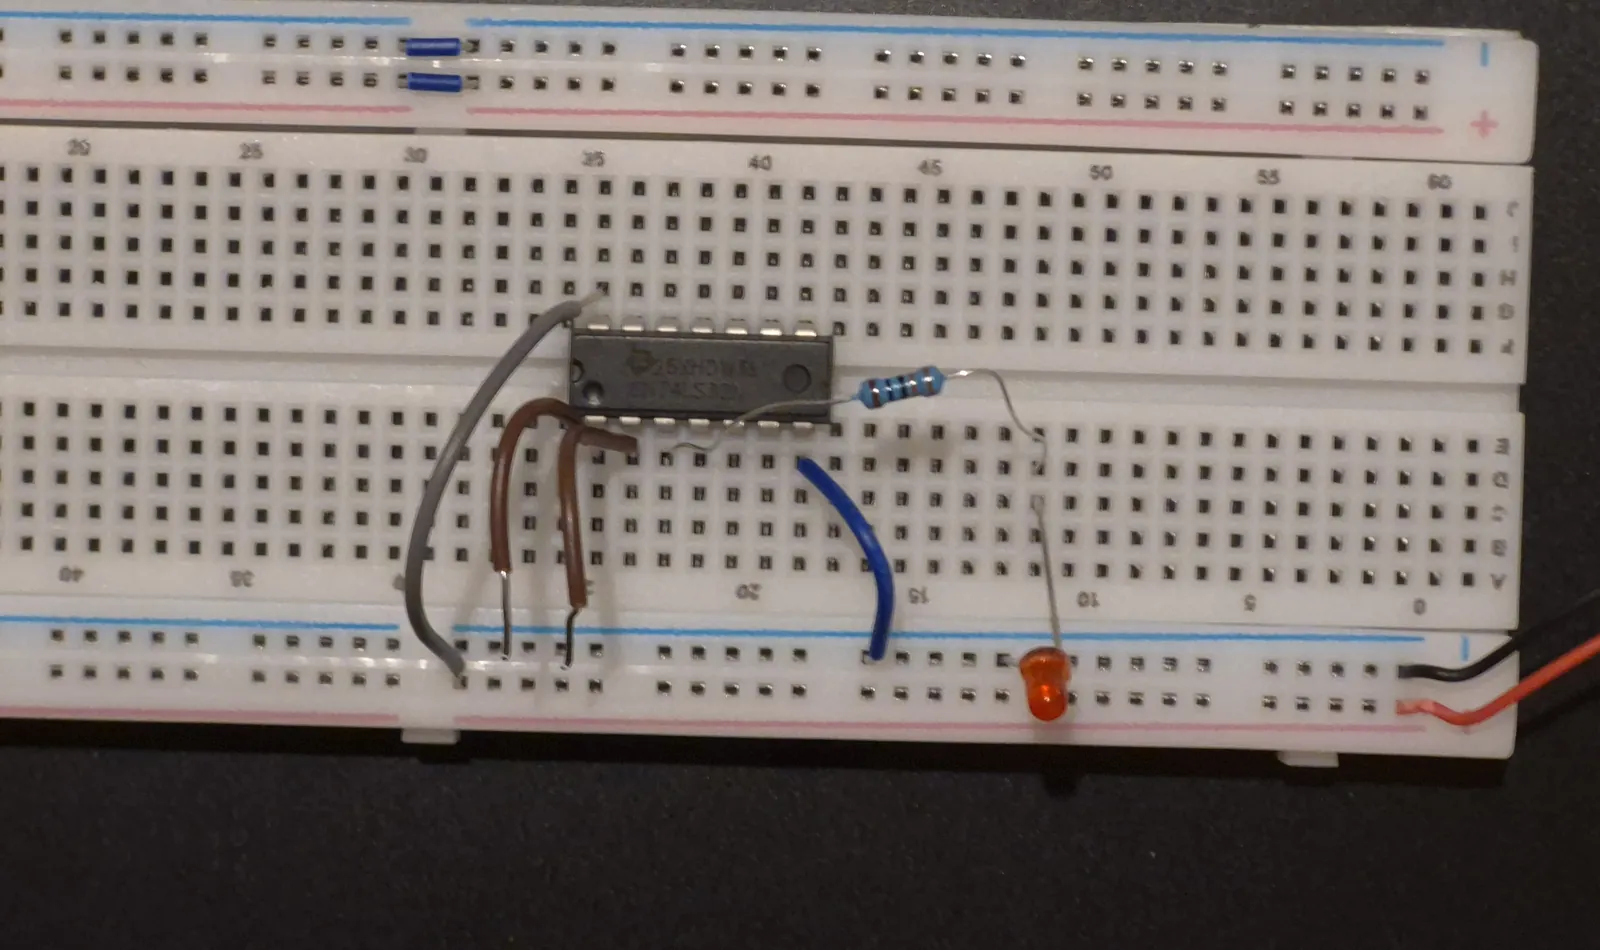
When we disconnect both of the wires that is when our output goes LOW and the LED stops lighting up.
Step 5: Test the truth table
| Input 1 | Input 2 | LED | Output | | ——- | ——- | — | —— | | HIGH | HIGH | ON | 1 | | HIGH | LOW | ON | 1 | | LOW | HIGH | ON | 1 | | LOW | LOW | OFF | 0 |
- Both wires are on HIGH. The LED is ON (1 + 1 = 1).
- Move input wire 2 from HIGH to ground. The LED is still ON, because input 1 is still HIGH.
- Put wire 2 back on HIGH. Now move input wire 1 to ground. The LED is still ON, because input 2 is still HIGH.
- Move both wires to ground. Now the output goes LOW and the LED turns OFF.